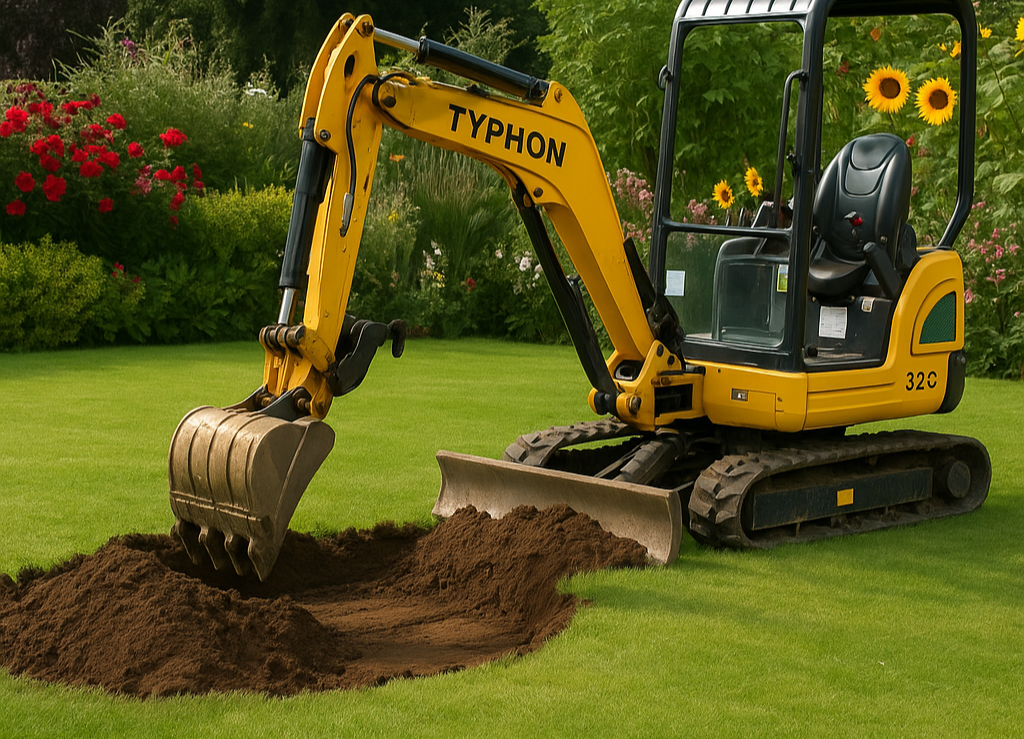
Landscaping your home is a challenging task with significant rewards, and a mini excavator can make the project a lot simpler. This smaller type of earthmoving machine with various capabilities is ideal for many different jobs, including digging a ditch and changing the level of the ground.
Whatever your case is, be it the first time you are dealing with outdoor space or an experienced one , a few mini excavator hacks can be appreciated in terms of time, effort, and money, as well as getting professional results.
In this guide, we will look into top mini excavator hacks for home landscaping that will teach you how to dig, grade, and work in tight spaces more effectively. Prepare to transform your garden into a haven by embarking on an expedition into the woods, with your home garden as the ultimate destination!
Why Use a Mini Excavator for Landscaping?
The small size, the maneuverability, and the flexibility of mini excavators have made them a preferred choice for homemakers who are into landscaping. This machine can do all the work a larger one can, but it can fit in small or medium yards where a larger one can’t. We will discuss some advantages of the mini excavator shortly, which will make it an excellent fit for your landscaping project. Such leaders are
- A mini excavator is user-friendly, and besides minimal training, it can be operated by a person without previous experience.
- They are available for various attachments; a mini excavator, for example, is capable of digging, trenching, and grading, as well as moving heavy items that require an effort.
- They work wonders! They automate 90% of work, and as a result, the manual labor will be less, thus you are going to be more productive.
Mini Excavator Hacks for Home Landscaping
Is there a way to boost your mini excavator’s abilities when working on landscaping? Sure, here are some quick tips and tricks to follow.
1. Use the Right Attachments for the Job
The mini excavator’s ability to use different attachments is the main feature that makes this equipment so valuable. Using the right attachments will significantly speed up your work and improve the quality of the results. Here are some essential mini excavator attachments for landscaping projects:
- Variety of Buckets: For planting trees, digging irrigation channels, or constructing flower beds, this is the most practical bucket.
- Fine Grading Bucket: The best for leveling and grading and also ideal for pouring out gravel.
- Thumb: People primarily use this tool to lift and move objects like rocks, logs, and debris.
- Auger: It is easy to use for drilling large holes or planting trees.
- Hydraulic Breaker: This tool functions as a hammer designed to break down concrete and large, hard rocks that are challenging to reduce into smaller pieces during demolition.
Trick: If you are just a temporary user of a mini excavator, first make sure to find out if the hiring company does provide any of the attachments for rent at a cheap rate. The right equipment can be the time-saver.
2. Master the Art of Precision Digging
It is well known that the landscaping task of digging takes a relatively large portion of the entire work period, so it is advisable to do the job in the most successful and qualitative way at once. Thus, some guidelines for precise and efficient digging may help you:
- Visual marking of the digging area: Utilize markers such as paint spray, flags, or wooden stakes and outline your intended digging location. This method effectively ensures task completion accuracy and prevents overstepping limits.
- Start Small: If you have never operated a mini excavator before, begin with shallow scoops and gradually deepen the trench to remain in control.
- Use the Offset Boom: Many mini excavators come with an off-set boom feature. When activated, the feature allows you to dig close to walls or obstacles without having to move the machine.
Hack: When you’re in the process of digging the trench, do the bucket at an angle for perfect edges, hence a faster and easier job at backfilling and finishing.
3. Optimize Soil Grading and Leveling
Grading and leveling are necessary for creating a smooth and even surface for lawns, patios, or driveways. One can use a mini excavator for the same purpose and complete the task efficiently given the right technique.
- Use a grading bucket: Connect to the mini an extra-wide, flat-bottomed grading bucket with which to move the extra mass from one side to another and make the surface flat.
- Work in Layers: It is better not to cut too deep on your first pass. Instead of cutting too deep on your first pass, it is advisable to remove a small piece at a time for better precision and control.
- Tilt the Blade: To achieve excellent drainage, use the bulldozer to make a slight slope. Setting the base of the patio or garden becomes easier, particularly during the activity.
Hack: For consistent leveling, the use of a laser level or string line may be helpful as grading tools.
4. Work Smarter in Tight Spaces
Mini excavators are known for being able to get into small spaces and work despite them, but to ensure safety and accuracy when working in those ares you need to plan and use your skills more effectively. Here is some advice on how to do it:
- Use the Zero-Tail Swing Feature. Many mini excavators are now designed with no tail swing meaning that you will avoid destroying any properties or constructions close to; also, you’ll be safe from any injuries caused by a swinging tail of the machine.
- Plan Your Movements: Strategically position the excavator so that it reduces repositioning to a minimum and maximizes efficiency.
- Keep Attachments Compact: If the ground is not wide and you need to make moves between fences or buildings, you should use the small-sized buckets and attachments.
Hack: You can use the boom swing of the excavator when working near obstacles to dig or material movement without moving the machine again.
5. Save Time with Efficient Backfilling
If you dug depressions or made flowerbeds, backfilling is a must. These ìðîñì äýíóð ÿôèéíî with the help of the following suggestions, will make the implementation time short and very productive.
- Use the dozer blade: mini excavators come equipped with a dozer blade as a standard feature, which will enable you to conveniently and quickly convert the overturned soil back into the trench or grade the material.
- Compact the Soil as You Go: The best way to fill and prevent settling at the same time is to compress a thin layer of soil after it is put down for backfill with the help of the bucket.
- Work from the Edges: Start filling from the sides of the trenches and moving in toward the center to avoid an uneven filling pattern.
Hack: Using a grading bucket, you can save a lot of time for backfilling by moving a larger volume of the material in one go due to its wide and flat surface.
6. Handle Heavy Materials Safely
Material handling is one of the tasks where a mini excavator can perform excellently. For instance, handling rocks, logs, or concrete slabs is challenging; however, it can be accomplished with the following helpful hints:
- Use a Thumb Attachment: A hydraulic thumb attachment will be of so much help in the process of lifting and moving these objects because it provides a very firm grip that is not easily removed.
- Balance the Load: Place the massive material that you want to move on the bucket or the attachment’s center in every turn to avoid a crash.
- Reduce the Speed: The routine control of the movement of materials at a slow pace is to prevent the products from falling off.
Hack: Securely pile objects on a pallet or a platform if there are multiple heavy objects, and you will save much time lifting them together.
7. Minimize Lawn and Property Damage
Often, the use of a mini excavator in the garden might lead to your lawn or property being damaged due to many reasons. Nonetheless, there are steps that you can take to prevent such an occurrence:
- Prefer Tracks over Wheels: Compared to wheels, rubber tracks cushion the load more evenly; hence, there is less chance of leaving ruts or tearing up grass.
- Put Mats Down: Position a piece of wood or a mat under the tracks of the excavator so that there will not be so much damage to surfaces such as lawns or driveways.
- Only in dry weather: Do not give the excavator an opportunity to sink in the mud; operate it on firm ground for a stable working condition.
Hack: Arrange the course of your machine in such a way that you cross fragile areas more times. Please complete all tasks in the selected area before proceeding to a new one.
8. Save Time with Proper Maintenance
Maintaining your mini excavator in excellent condition is the key to having it work smoothly and preventing machine failures from occurring unexpectedly while landscaping. Implement the following maintenance plan:
- Dipstick: Enter the hydraulic fluid, engine oil, and coolant levels in that order before you start with the machine.
- Check Add-ons: Verify that all add-ons are safe and undamaged, as they are closely linked.
- Track and Bucket Cleaning: Keep up performances at the required level by removing the dirt and mud from these spots.
Hack: Establish a regular schedule for maintenance and follow it. A routine check-up will save you time and money and extend the life of worn-out or faulty equipment.
Some of the General Landscaping Projects that Can Be Done with a Mini Excavator
Here are some common landscaping projects you can easily complete at home with a mini excavator:
- Digging Garden Beds: Make the garden look neat by planting the flowers or vegetables in the order you like.
- Installing Irrigation Systems: You can dig a ditch perfectly for the pipelines and sprinkler systems.
- Building Retaining Walls: You will dig the earth and convey the materials produced as well as work on the wall construction.
- Grading for Patios or Driveways: Smooth the ground to start the process of hardscaping for your patios or driveways.
- Tree Planting or Removal: You can get a balanced earth with assons for planting the trees, or with the help of the bucket you will also be able to remove the stumps.
Summary
Life will never be the same after a mini excavator joins you in your home gardening spree; it brings with it not only flexibility but also efficiency and ease of work. These hacks will help you make full use of a mini excavator, and you will be able to convert your yard into a place that is not only beautiful but also useful.
Whether it’s digging, grading, or moving heavy materials, the right techniques and tools will make your landscaping project faster, safer, and more enjoyable. So, rent or invest in a mini excavator, follow these tips, and unleash your inner DIY landscaper—your dream yard is just a few scoops away!